
Kombucha 101 | Brewing Your First Batch of Kombucha


In this series, Kombucha 101, I’m going to walk you through the process of making your own kombucha at home with ingredients you likely already have. Let’s get makin’.
Part 1: Growing Your Own Kombucha Scoby
Part 2: Brewing Your First Batch of Kombucha
Part 3: Bottling and Flavoring Homemade Kombucha
BREWING YOUR OWN KOMBUCHA AT HOME
Okay, so you’ve fallen into the kombucha craze. Welcome to the gang; we don’t have t-shirts, but we have healthy gut biomes.
I’m also assuming you’re here because you’ve already grown your SCOBY and you’re now hoping to pop that gelatinous pancake into a jar of soon-to-be kombucha. You’ve come to the right place.
If you grew your SCOBY through my recommended method, good news: the method for brewing your first batch of kombucha is almost the exact same process. Make tea, add starter, wait. The only difference is the addition of your SCOBY. Let’s get started.
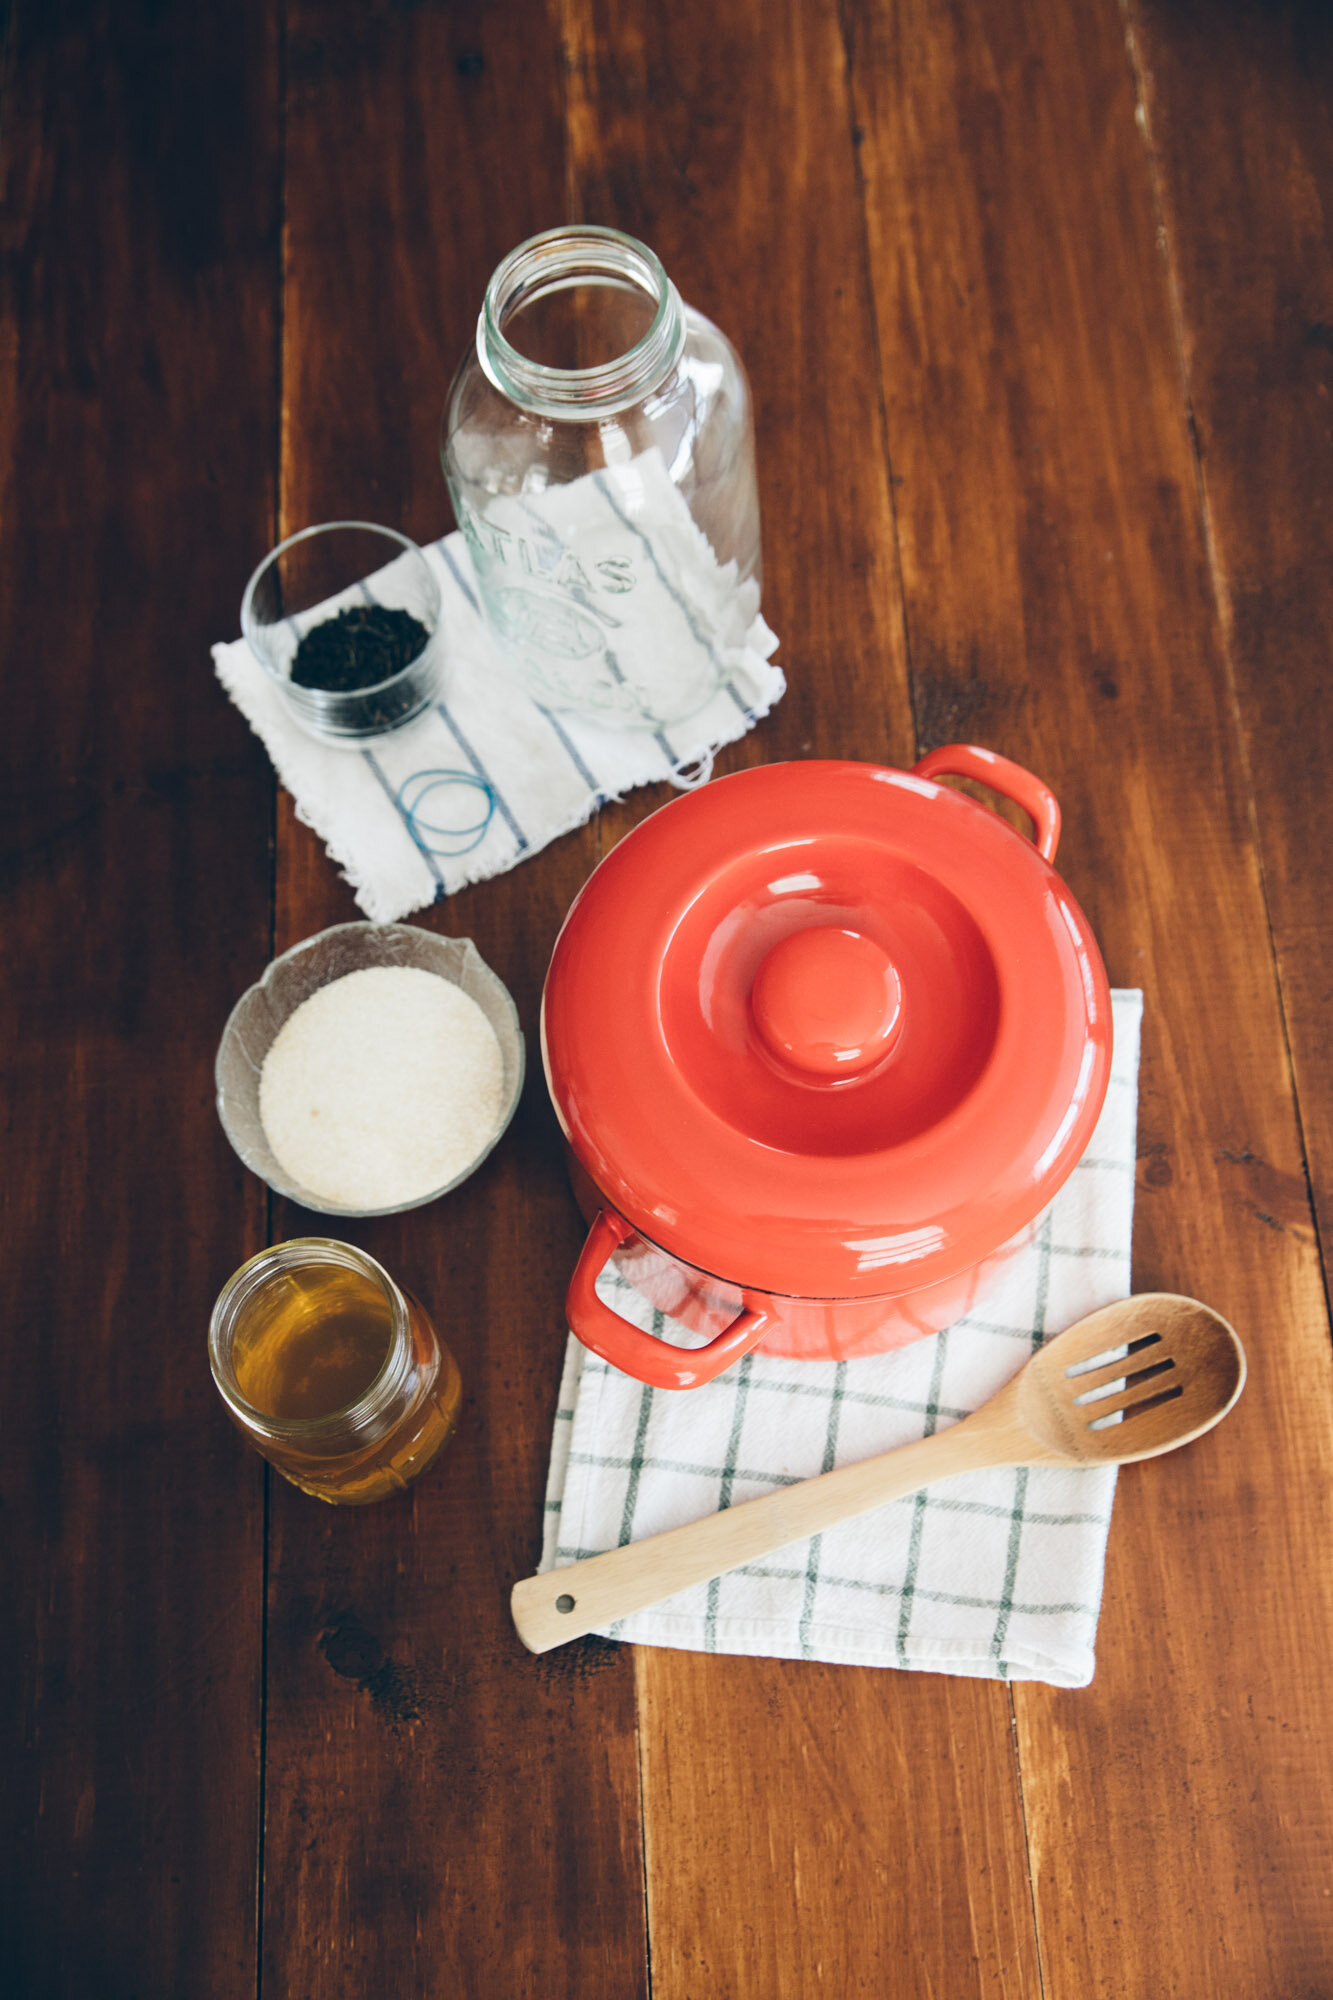
HOW TO BREW YOUR OWN KOMBUCHA
You’ll need:
A SCOBY - you grew your own, right? If not, snag one from online or ask your kombucha community for a spare.
A fermentation vessel - Preferably the same one you grew your SCOBY within.
2 tbs. loose or 8 bags of organic black tea - Choose any variety that’s unflavored. I like to create a mix of black tea and green tea for my brews, but to start off, let’s just use your standard loose leaf black tea.
2 c. starter tea - If you started your own SCOBY at home, you’ll have plenty of starter tea to use from the growth batch. If not, grab a bottle from the grocery store or ask one of your kombucha-making friends.
1 c. sugar - White cane sugar is your best bet.
Scrap cloth and a rubber band - I use a cut-up tea towel, but you can use any fabric with a tight weave (no cheesecloth).
STEP 1: PREP YOUR INGREDIENTS
There are a few ways to set up your space for a foolproof brew sesh, but it’s best to develop your strategy after two or three batches to figure out what really works in your kitchen. For now, I recommend removing your SCOBY from the fermentation vessel and placing it on a clean plate while you brew. This will lessen any chance that you burn your SCOBY with hot tea.
Next, set aside two cups of starter tea from your SCOBY batch. If you neglected to save any tea from this growth batch, no worries — just grab an organic, unflavored, and unpasteurized bottle of kombucha from your grocery store. If your tea is refrigerated, let it sit out to reach room temperature while making the sweet tea.
At this point, your fermentation vessel should be completely empty. You may be tempted to wash it before brewing, but it’s not necessary.

STEP 2: MAKE YOUR TEA
If you made your SCOBY using my method, the process for making the sweet tea is the same:
First, bring one quart of water to a boil and remove from heat. Add 1 cup of sugar to the pot and stir until dissolved. Add in either 8 bags of tea or 2 tbs of loose tea contained in a mesh tea strainer and stir to combine.
Allow the tea to steep according to the product instructions. I usually let the tea steep for longer since we’re essentially creating a hyper-concentrated sweet tea, but if you want to minimize your variables, just follow the instructions on the tea packet. Remove the teabags or strainer and allow the mixture to cool slightly.
Once cooled, pour the sweet tea into your fermentation vessel. Add a little less than 2 more quarts of room-temperature water to the vessel. Stir to combine.
STEP 3: ADD YOUR STARTER TEA AND SCOBY
Check that your sweet tea is within the temperature range of 68-80 degrees. Feel free to add an ice cube or two to bring the temperature down. Once your tea is at room temp, add two cups of the starter tea to your mix and stir to combine.
Next, gently slide your SCOBY into the fermentation vessel, noting which side is “up.” Generally, the more ragged side is the bottom part of your SCOBY, while the smoother half is the top.
Cap your vessel by covering it with a cloth and securing the cloth with a rubber band. Again, do not cap your tea with a screw-top lid. We’ll be using sealed containers in the second fermentation.
STEP 4: FERMENT!
On a post-it note or a piece of masking tape, mark the date and type of tea and affix the note to your vessel. Hide the tea in a dark and dry place, such as a kitchen cabinet, for one week, checking in on it every other day or so.
Depending on the average temperature of your home and your taste preferences, the first fermentation can take anywhere from one to three weeks to reach the desired tanginess. The only way to know is to test it out.
After at least one week, dip a straw into the brewing vessel near the edge of the SCOBY. Take a small sip through the straw and lift up, maintaining the suction until the straw is completely out of the vessel (you don’t want to backwash into your brew). How does it taste? Does it have that signature tang of kombucha, or is it still too sweet? If it needs a few more days, cover the vessel and place it back in the cabinet.

TROUBLESHOOTING
Let’s go over some common questions that first-time brewers often have:
My brew doesn’t taste like kombucha! Give it more time. I was excited to try my first batch after exactly one week. We’re talking down to the minute here. My brew tasted like sweet tea with the tiniest whisper of sour. In the end, it took nearly 2.5 weeks for my first batch to be tangy enough for me.
What’s this growth on my SCOBY? Probably nothing serious. White and brown splotches pop up just to keep us brewers attentive. However, if you see green or black patches, you might have a case of mold.
What is that smell? Fermentation, of course! When you open whichever cabinet your kombucha is hiding within, you’re going to get hit with a big cloud of sweet vinegar smells. However, if your kombucha or SCOBY smells rancid or otherwise unpleasant, time to toss and start over.
When your brew is finally ready to be enjoyed, you have two options: drink as is, or add flavorings and effervescence in the second fermentation. Tip: always do a second fermentation. Life is better with bubbles.

Next Up: Bottling and Flavoring Homemade Kombucha
I like to give you the head’s up that some posts contain affiliate links. I never link out any product I wouldn’t personally use, and I always recommend that you borrow, make, or buy used when possible.


Minimize your hair washing schedule with this simple, two-ingredient DIY dry shampoo recipe.